```html
Removing Glued-Down Wood Floors: A Comprehensive Guide
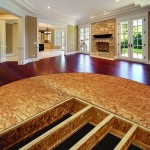
Removing a glued-down wood floor can be a challenging but manageable task for both seasoned DIY enthusiasts and first-time homeowners. The primary goal is to detach the wood flooring from the subfloor without causing significant damage to the subfloor itself, as this can lead to further complications and expenses during subsequent flooring installation. This process requires patience, the right tools, and a thorough understanding of the techniques involved.
The difficulty of removing a glued-down floor is heavily influenced by the type of adhesive used, the age of the installation, and the type of subfloor to which the wood is adhered. Older adhesives may have become brittle and easier to break, while newer, stronger adhesives present a greater challenge. Similarly, the subfloor material (e.g., concrete, plywood, or OSB) will dictate the appropriate removal methods and impact the potential for damage during the process. Careful assessment of these factors before commencing the removal is crucial for a successful outcome.
Prior to embarking on the removal process, it is essential to ensure adequate safety precautions are in place. The removal process can generate dust and potentially hazardous substances, depending on the type of adhesive used. Therefore, wearing appropriate personal protective equipment (PPE) is paramount. This includes safety glasses to protect the eyes from flying debris, a dust mask or respirator to avoid inhaling dust particles, work gloves to protect the hands from sharp edges and splinters, and hearing protection, especially when using power tools.
Key Point 1: Gathering the Necessary Tools and Materials
Success in removing a glued-down wood floor largely depends on having the right tools and materials at hand. This not only streamlines the process but also minimizes the risk of damage to the subfloor. A comprehensive toolkit for this project should include:
- A floor scraper: This is a fundamental tool for lifting the wood flooring from the subfloor. Both manual and power scrapers are available. Manual scrapers are suitable for smaller areas or delicate work, while power scrapers are more efficient for larger areas.
- A pry bar: A pry bar can be used to lift stubborn sections of flooring that resist the scraper. Choose a pry bar with a wide, flat head to minimize damage to the subfloor.
- A hammer: A hammer will be needed to drive the scraper or pry bar under the flooring. A rubber mallet can also be useful for gentler persuasion.
- A heat gun or steamer: Heat can soften the adhesive, making it easier to remove the flooring. A heat gun provides targeted heat, while a steamer provides more widespread heat and moisture. Exercise caution when using a heat gun to avoid scorching the wood or adhesive.
- A putty knife or chisel: These tools are useful for scraping away residual adhesive from the subfloor after the flooring has been removed.
- A utility knife: A utility knife can be used to score the flooring into smaller, more manageable sections.
- A shop vacuum: A shop vacuum is essential for cleaning up dust and debris throughout the removal process.
- Safety glasses, dust mask, work gloves, and hearing protection: As mentioned earlier, these PPE items are crucial for protecting yourself from potential hazards.
- Solvent or adhesive remover (optional): In cases where adhesive residue is particularly stubborn, a solvent or adhesive remover may be necessary. Ensure the chosen solvent is compatible with the subfloor material and follow the manufacturer's instructions carefully.
Before starting the removal process, it is advantageous to have a clear understanding of the area being worked on. Removing furniture, appliances, and any other obstacles is crucial. Clearly define the work area, ensuring adequate ventilation, especially if using solvents or adhesive removers. Protecting adjacent surfaces with drop cloths or plastic sheeting can prevent unintended damage or staining.
Key Point 2: The Removal Process: Step-by-Step
The process of removing glued-down wood flooring generally involves the following steps:
- Preparation: Don your PPE and prepare the work area as described above. Open windows or use fans to ensure adequate ventilation.
- Scoring the Flooring: Using a utility knife, score the flooring into smaller, manageable sections. This will make it easier to lift the flooring and reduce the risk of splintering. Score along the grain of the wood whenever possible.
- Heating the Adhesive (Optional): If you are using a heat gun or steamer, apply heat to a small section of the flooring to soften the adhesive. Move the heat source slowly and evenly to avoid scorching the wood. For steaming, hold the steamer nozzle close to the flooring for a few seconds at a time.
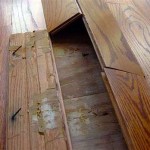
- Scraping the Flooring: Position the floor scraper at the edge of a scored section of flooring. Apply firm, even pressure to the scraper, working it under the flooring to detach it from the subfloor. For stubborn areas, use a hammer to tap the scraper blade under the flooring. Work slowly and methodically, avoiding excessive force that could damage the subfloor.
- Using a Pry Bar (As Needed): If the flooring is particularly difficult to remove, use a pry bar to lift it. Insert the pry bar under the flooring, being careful not to damage the subfloor. Apply gentle leverage to lift the flooring.
- Removing Adhesive Residue: After the flooring has been removed, there will likely be adhesive residue remaining on the subfloor. Use a putty knife or chisel to scrape away the residue. For stubborn residue, a solvent or adhesive remover may be necessary. Apply the solvent according to the manufacturer's instructions, allowing it to dwell for the recommended time before scraping away the softened residue.
- Cleaning the Subfloor: Once all the flooring and adhesive residue have been removed, thoroughly clean the subfloor with a shop vacuum. Inspect the subfloor for any damage, such as gouges or cracks. Repair any damage before installing new flooring.
- Disposal: Dispose of the removed flooring and adhesive residue properly, following local regulations for waste disposal. Adhesives may contain hazardous materials, so it is important to handle them responsibly.
The efficiency of each step will depend greatly on the specific type of adhesive used and the condition of the subfloor. Patience and careful execution are paramount to minimizing damage and achieving a clean subfloor surface ready for new flooring installation.
Key Point 3: Addressing Common Challenges and Potential Issues
Despite careful planning and execution, several challenges and potential issues may arise during the removal of glued-down wood flooring. Being prepared to address these issues will ensure a smoother and more successful project.
Subfloor Damage: One of the most common challenges is damage to the subfloor during the removal process. Excessive force, improper tool use, or a weak subfloor can all contribute to damage. If the subfloor is damaged, it will need to be repaired before new flooring can be installed. Small gouges or cracks can often be filled with patching compound. More extensive damage may require replacing sections of the subfloor.
Stubborn Adhesive: Some adhesives are notoriously difficult to remove, even with heat and solvents. In these cases, multiple applications of solvent, combined with persistent scraping, may be necessary. Consider using a specialized adhesive remover designed for the specific type of adhesive used. Be sure to test the solvent in an inconspicuous area first to ensure it does not damage the subfloor.
Asbestos in Older Adhesives: In older homes, particularly those built before the 1980s, the adhesive used to install the wood flooring may contain asbestos. Asbestos is a hazardous material that can cause serious health problems if inhaled. If you suspect that the adhesive may contain asbestos, it is crucial to have it tested by a qualified professional before proceeding with the removal. If asbestos is present, it is best to hire a licensed asbestos abatement contractor to remove the flooring safely.
Uneven Subfloor: After the flooring has been removed, the subfloor may be uneven. An uneven subfloor can cause problems with the installation of new flooring. Use a level to check the subfloor for any high or low spots. Small imperfections can often be corrected with self-leveling compound. Larger imperfections may require more extensive repairs.
Dust Control: Removing glued-down wood flooring can generate a significant amount of dust. This dust can be irritating to the eyes and respiratory system. Use a shop vacuum with a HEPA filter to control dust. Seal off the work area with plastic sheeting to prevent dust from spreading to other parts of the house. Be sure to wear a dust mask or respirator at all times when working in the area.
By anticipating potential challenges and having a plan to address them, the removal of glued-down wood flooring can be accomplished safely and effectively, paving the way for a fresh and updated flooring installation.
```
Wood Floor Removal Glued Down Jbl Flooring

How To Remove Glued Wood Flooring And Engineered On Concrete

Removing Glue Or Adhesive From Hardwood Floors The Speckled Goat

Easily Demo Your Floors Remove Nailed Down Hardwood Flooring

How Do I Remove Wood Parquet Flooring That Is Glued Down Super Tight Hometalk

How To Remove Hardwood Glued Down From Concrete Slab

Removing Glue Or Adhesive From Hardwood Floors The Speckled Goat

How To Remove Glued Wood Flooring Youtube

Removing Parquet Flooring Floor Adhesive Lessons Learned Life After 40

Removing Glue Or Adhesive From Hardwood Floors The Speckled Goat