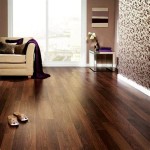
How To Remove Scratches From A Wood Floor
Wood floors, prized for their aesthetic appeal and durability, are nonetheless susceptible to scratches from furniture, pets, foot traffic, and dropped objects. Addressing these blemishes promptly and effectively can restore the floor's original luster and prevent further damage. The process for removing scratches varies depending on the depth and severity of the damage. Minor surface scratches often require simple remedies, while deeper gouges may necessitate more involved techniques.
Before commencing any scratch removal procedure, it is crucial to identify the type of finish applied to the wood floor. Common finishes include polyurethane, varnish, wax, and oil. Misidentifying the finish and using an incompatible product could lead to further damage, discoloration, or an uneven appearance. Consulting the original flooring documentation or contacting the manufacturer can help determine the finish type. If uncertainty persists, testing a small, inconspicuous area with the chosen cleaning or repair product is recommended.
Proper preparation is essential for successful scratch removal. Begin by thoroughly cleaning the affected area to remove dirt, dust, and debris. This can be achieved using a soft-bristled broom, a microfiber mop, or a vacuum cleaner with a floor attachment. Avoid using excessive water, as it can seep into the wood and cause warping or swelling. Once the area is clean, inspect the scratch carefully to assess its depth and determine the appropriate repair method.
Addressing Minor Surface Scratches
Superficial scratches that only affect the finish layer can often be remedied with simple techniques. One approach involves using a scratch concealer or touch-up marker designed specifically for wood floors. These products contain pigmented waxes or stains that fill in the scratch and blend with the surrounding finish. Select a concealer or marker that closely matches the floor's color. Apply the product directly to the scratch, following the manufacturer's instructions. Gently wipe away any excess with a clean, soft cloth. Allow the area to dry completely before walking on it.
Another method for addressing minor scratches involves using a paste made from baking soda and olive oil. Mix equal parts of baking soda and olive oil to create a thick paste. Apply the paste to the scratch and gently rub it in using a soft cloth or sponge. Work in the direction of the wood grain. After a few minutes, wipe away the excess paste with a clean, damp cloth. Buff the area dry with a soft cloth. The baking soda acts as a mild abrasive, while the olive oil helps to lubricate and moisturize the wood.
For floors with a wax finish, applying a fresh coat of wax can often conceal minor scratches. Clean the affected area thoroughly and allow it to dry completely. Apply a thin layer of paste wax to the scratch, following the manufacturer's instructions. Use a soft cloth or applicator pad to rub the wax into the wood, working in the direction of the grain. Allow the wax to dry completely, typically for 30 minutes to an hour. Buff the area with a clean, soft cloth to restore the shine.
Repairing Deeper Scratches and Gouges
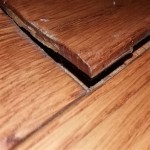
Deeper scratches that penetrate the finish and expose the bare wood require more extensive repair techniques. One common method involves using wood filler or putty. Select a wood filler that closely matches the floor's color and grain. Clean the scratch thoroughly and remove any loose debris. Apply the wood filler to the scratch using a putty knife or spatula. Overfill the scratch slightly to allow for sanding. Allow the wood filler to dry completely, following the manufacturer's instructions. Once dry, sand the area smooth using fine-grit sandpaper, blending it with the surrounding floor. Wipe away any sanding dust with a clean, damp cloth. Apply a finish that matches the existing floor to seal the repair. This may involve applying stain, varnish, or polyurethane.
Another option for repairing deep scratches is to use wood veneer. Wood veneer is a thin layer of real wood that can be applied to the damaged area. Select a veneer that closely matches the floor's species, color, and grain. Carefully cut the veneer to the size and shape of the scratch. Apply wood glue to the back of the veneer and position it over the scratch. Press the veneer firmly into place and hold it for several minutes until the glue sets. Use a utility knife to trim any excess veneer. Sand the edges smooth and blend them with the surrounding floor. Apply a finish that matches the existing floor to seal the repair.
In cases of severe damage, such as deep gouges or splits in the wood, replacing the damaged plank may be the most effective solution. This involves removing the damaged plank and replacing it with a new one. Carefully cut around the damaged plank using a utility knife or saw. Remove the plank and clean the area thoroughly. Apply wood glue to the subfloor and position the new plank in place. Secure the plank with nails or screws. Fill any gaps with wood filler and sand the area smooth. Apply a finish that matches the existing floor to seal the repair. Replacing a damaged plank requires specialized tools and skills, and it may be necessary to hire a professional flooring contractor.
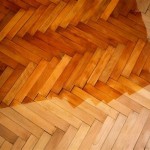
Refinishing the Entire Wood Floor
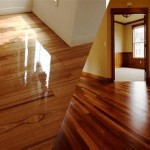
When a wood floor has numerous scratches or significant wear and tear, refinishing the entire floor may be the most effective solution. Refinishing involves sanding down the existing finish and applying a new coat of finish. This process can restore the floor to its original luster and provide a uniform appearance. Refinishing a wood floor requires specialized equipment, including a floor sander, edger, and vacuum cleaner. It is also a labor-intensive process that can generate a significant amount of dust.
Before refinishing a wood floor, it is essential to prepare the area properly. Remove all furniture, rugs, and other items from the room. Cover any doorways or openings to prevent dust from spreading to other areas of the house. Wear a respirator mask and eye protection to protect against dust and fumes. Begin by sanding the floor with a coarse-grit sandpaper to remove the existing finish and level the surface. Gradually transition to finer-grit sandpaper to smooth the floor and remove any scratches or imperfections. Use an edger to sand along the walls and in corners. Vacuum the floor thoroughly to remove all sanding dust.
Once the floor is sanded and clean, apply a new coat of finish. Choose a finish that is appropriate for the type of wood and the desired level of durability. Common finishes include polyurethane, varnish, and oil-based finishes. Apply the finish evenly using a brush, roller, or applicator pad. Allow the finish to dry completely, following the manufacturer's instructions. Apply additional coats of finish as needed to achieve the desired level of protection and shine. Between coats, lightly sand the floor with fine-grit sandpaper to smooth the surface and remove any imperfections. Vacuum the floor thoroughly after each sanding. Allow the final coat of finish to dry completely before walking on the floor or replacing furniture.
Maintaining a wood floor after scratch removal or refinishing is crucial for preserving its appearance and preventing future damage. Use rugs or mats in high-traffic areas to protect the floor from wear and tear. Place felt pads under the legs of furniture to prevent scratches. Avoid wearing shoes with hard heels or cleats on the floor. Clean the floor regularly using a soft-bristled broom, a microfiber mop, or a vacuum cleaner with a floor attachment. Use a wood floor cleaner that is specifically designed for the type of finish on the floor. Avoid using excessive water or harsh chemicals, as they can damage the wood or the finish.
Regular inspections can help identify and address potential problems before they become major issues. Addressing scratches promptly prevents them from becoming deeper or wider. Routine maintenance, such as cleaning and waxing, can help protect the finish and prolong the life of the floor. By following these guidelines, wood floors can maintain their beauty and durability for many years to come.

How To Repair Wood Floor Scratches Quick Fix Friday Polished Habitat

How To Remove Scratches From Wood Floors Svb

3 Ways To Eliminate Scratches On Wood Floors Youtube

3 Diy Way To Fix A Scratch In Hardwood Floors 5 Steps With Pictures Instructables

How To Fix Scratches On Laminate Flooring Directflooring Direct

How To Remove Scratches From Hardwood Floors

Fix Scratched Hardwood Floors In About Five Minutes The Chronicles Of Home

Fix A White Flooring Scratch Hardwood Floor Repair Youtube

How To Fix Gouges Dents And Deep Scratches In Hardwood Floors Youtube

How To Repair Your Wood Floors Kährs
See Also