How To Clean A Wooden Floor: A Comprehensive Guide
Maintaining a clean and aesthetically pleasing wooden floor requires a consistent cleaning routine and the application of appropriate techniques. Wooden floors, while offering warmth and elegance to any space, are susceptible to damage from dirt, spills, and improper cleaning methods. Understanding the correct procedures and selecting the right products are crucial for preserving the longevity and beauty of the floor.
This article provides a detailed guide on how to effectively clean a wooden floor, covering the essential steps, necessary tools, and preventative measures to ensure optimal maintenance.
Preparation is Key: Removing Debris and Preventing Scratches
Before initiating any wet cleaning process, it's imperative to thoroughly remove loose debris such as dust, dirt, pet hair, and crumbs. This step prevents these particles from scratching the floor's surface during subsequent cleaning stages. The most effective methods for debris removal are sweeping, vacuuming, and using a dry microfiber mop.
Sweeping: Use a soft-bristled broom specifically designed for hardwood floors. Avoid brooms with stiff or coarse bristles, as these can scratch the floor's finish. Sweep in the direction of the wood grain to efficiently collect debris. Pay particular attention to corners and edges where dirt tends to accumulate.
Vacuuming: Utilize a vacuum cleaner with a soft brush attachment. This attachment will prevent the vacuum head from directly contacting the floor, minimizing the risk of scratches. Disable the beater bar or brush roll if your vacuum cleaner has this feature, as it can damage the wood's surface. Vacuum in overlapping passes, ensuring all areas are covered.
Dry Microfiber Mop: A dry microfiber mop is an excellent tool for capturing dust and fine particles that sweeping or vacuuming may miss. The electrostatic properties of microfiber attract and hold dust effectively. Use a clean microfiber pad for each cleaning session to prevent the spread of dirt.
It is advisable to place mats or rugs at entryways to minimize the amount of dirt and debris tracked onto the wooden floor. Regularly clean or replace these mats to maintain their effectiveness.
Selecting the Right Cleaning Solution: Understanding Wood Floor Finishes
The choice of cleaning solution is paramount to preserving the integrity of the wooden floor. Different floor finishes require specific cleaning agents, and using the wrong product can lead to damage such as dullness, discoloration, and even warping. Identifying the type of finish on your wooden floor is the first step in selecting the appropriate cleaner.
Surface Finishes: Floors with surface finishes, such as polyurethane, varnish, or lacquer, are the most common and are relatively resistant to water damage. These finishes create a protective layer on top of the wood. For surface-finished floors, a pH-neutral cleaner specifically formulated for hardwood floors is recommended. Avoid using abrasive cleaners, ammonia-based products, or oil-based soaps, as these can damage the finish.
Penetrating Finishes: Floors with penetrating finishes, such as oil or wax, require specialized cleaning products designed to nourish and protect the wood. These finishes penetrate the wood fibers rather than forming a surface layer. Consult the manufacturer's recommendations for the appropriate cleaning and maintenance products for floors with penetrating finishes. Avoid using water-based cleaners on oil or wax-finished floors, as they can damage the wood and strip away the finish.
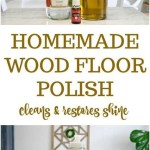
DIY Cleaning Solutions: While commercially available wood floor cleaners are generally recommended, some DIY solutions can be used with caution. A mixture of water and a small amount of white vinegar can be effective for cleaning surface-finished floors. However, it's crucial to use a diluted solution (approximately 1/4 cup of vinegar per gallon of water) to avoid damaging the finish. Always test any cleaning solution in an inconspicuous area before applying it to the entire floor.
Regardless of the cleaning solution chosen, always follow the manufacturer's instructions carefully. Over-wetting the floor can lead to water damage, so use the minimum amount of solution necessary to clean the surface.
The Wet Cleaning Process: Gentle Application and Thorough Drying
Once the floor has been properly prepared and the appropriate cleaning solution selected, the wet cleaning process can begin. The key to successful wet cleaning is to use a damp mop, not a soaking wet one, and to dry the floor thoroughly after cleaning. Over-wetting the floor is a common mistake that can lead to water damage, warping, and discoloration.
Damp Mopping: Use a microfiber mop with a flat head. Microfiber mops are highly absorbent and effective at removing dirt and grime. Dip the mop into the cleaning solution and wring it out thoroughly until it is only damp. The mop should not be dripping wet. Mop the floor in the direction of the wood grain, using overlapping strokes to ensure complete coverage.
Working in Sections: Clean the floor in small sections to prevent the cleaning solution from drying on the surface. As each section is cleaned, use a clean, dry microfiber cloth to immediately wipe away any excess moisture. This step is crucial for preventing water spots and streaks.
Rinsing (Optional): If the cleaning solution leaves a residue, rinse the floor with clean water. Use the same damp mopping technique, ensuring the mop is thoroughly wrung out. Immediately dry the floor with a clean, dry microfiber cloth.
Drying: After wet cleaning, allow the floor to air dry completely. Open windows or use fans to improve ventilation and speed up the drying process. Avoid walking on the floor until it is completely dry to prevent tracking dirt and leaving footprints.
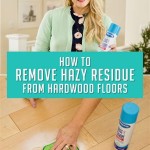
For particularly stubborn stains, such as those caused by spills or pet accidents, use a specialized stain remover designed for hardwood floors. Follow the manufacturer's instructions carefully and test the product in an inconspicuous area before applying it to the stain.
Preventative Maintenance: Minimizing Damage and Extending Floor Life
Preventative maintenance is essential for minimizing damage and extending the life of the wooden floor. Implementing a few simple practices can significantly reduce the need for frequent and intensive cleaning.
Protective Measures: Place mats or rugs at entryways to trap dirt and debris before they are tracked onto the floor. Use furniture pads under the legs of chairs, tables, and other furniture to prevent scratches and dents. Avoid wearing shoes with hard soles or heels on the wooden floor.
Spills and Accidents: Clean up spills immediately to prevent staining and water damage. Use a clean, absorbent cloth to blot the spill, working from the outside in to prevent it from spreading. Avoid rubbing the spill, as this can push it deeper into the wood fibers.
Humidity Control: Maintain a consistent humidity level in the home to prevent the wood from expanding or contracting. Excessive humidity can cause the wood to swell, while low humidity can cause it to shrink and crack. Use a humidifier or dehumidifier to regulate humidity levels as needed.
Regular Inspection: Regularly inspect the floor for signs of damage, such as scratches, dents, or water spots. Address any issues promptly to prevent them from worsening. Consider refinishing the floor every few years to restore its appearance and protect it from further damage.
By following these guidelines and implementing a consistent cleaning and maintenance routine, the beauty and longevity of a wooden floor can be preserved for years to come.

How To Clean Hardwood Floors Reviews By Wirecutter

How To Clean Hardwood Floors The Home

How To Clean And Shine Hardwood Floors Fast Easy Tips

The Ultimate Guide To Cleaning Hardwood Floors Wood Clean Floor Cleaner

Hardwood Floor Cleaning Stanley Steemer

2024 Best Tips For Keeping Your Hardwood Floors Clean And Polished

How To Clean Hardwood Floors Like A Pro

How Do You Deep Clean Wood Floors Chem Dry

How To Clean Hardwood Floors The Home

How To Clean Wood Floors Hardwood The Handy Home Blog