Filling Cracks in Wood Floors: A Guide to Repair and Restoration
Wood floors, with their natural beauty and timeless appeal, are a popular choice for homeowners. However, these floors are susceptible to cracks, which can detract from their aesthetic value and even compromise their structural integrity. The appearance of cracks in wood floors can be attributed to various factors, including age, moisture fluctuations, and structural movement. Regardless of the cause, filling these cracks is essential to maintain the floor's beauty and longevity.
Filling cracks in wood floors is a relatively straightforward process that can be accomplished by homeowners with basic DIY skills. However, it is important to approach this task with careful planning and proper techniques. This guide will provide a comprehensive overview of the steps involved in filling cracks in wood floors, ensuring a seamless and durable repair.
Assessing the Cracks
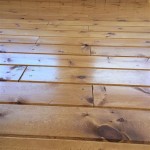
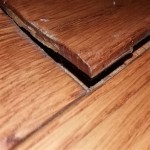
The first step in filling cracks in wood floor is to thoroughly assess the severity and nature of the cracks. This involves identifying the size, depth, and location of each crack. Small, hairline cracks can often be addressed with simple fillers, while deeper, wider cracks may require a more comprehensive approach. It's crucial to determine if the crack is merely a cosmetic issue or indicative of a structural problem. If the crack is associated with a warped or damaged floorboard, it may be necessary to replace the board altogether.
Preparing the Cracks
Once the cracks have been assessed, the next step involves preparing the area for filling. This includes cleaning the cracks thoroughly to remove any dirt, debris, or loose wood fibers. A vacuum cleaner or a damp cloth can be used for this purpose. If the cracks are particularly deep or wide, it may be necessary to use a chisel or putty knife to widen the cracks slightly, creating a more even surface for the filler to adhere to. This step ensures a smooth, professional finish after filling.
Choosing the Right Filler
The choice of filler depends on the size and depth of the cracks. For small, hairline cracks, wood filler sticks are an effective and easy to use solution. These sticks are available in various wood tones and can be easily applied with a finger or a small spatula. For wider and deeper cracks, a wood filler putty is often a better choice. These putties are available in both water-based and oil-based formulations and can be applied with a putty knife. When selecting a filler, consider the color of the wood floor to ensure the filler blends seamlessly with the surrounding surface.
Filling the Cracks
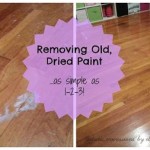
Once the filler has been selected, it's time to fill the cracks. This process involves carefully applying the filler to the crack, making sure to press it firmly into the opening. Use a putty knife or a finger to smooth out the filler, ensuring it is flush with the surrounding wood. Be sure to remove any excess filler, especially if the filler is water-based, as it can dry and become difficult to remove. It's recommended to allow the filler to dry completely before sanding or painting.
Sanding and Finishing
After the filler has dried, it's time to sand the repaired area to create a smooth, seamless finish. Start with a coarse sandpaper and gradually work your way to a finer grit. Sanding removes any excess filler and blends the repaired area with the surrounding wood. Once the sanding is complete, you can stain or paint the repaired area to match the rest of the floor. If the cracks are located in a high-traffic area, consider applying a sealant to the repaired area to protect it from wear and tear.
Preventing Future Cracks
While filling cracks is an effective way to repair damaged wood floors, preventing future cracks is equally important. Several measures can help protect your wood floors and minimize the risk of cracking. These include:
Maintaining Proper Humidity Levels
Wood floors are highly sensitive to changes in humidity. Excessive dryness can cause the wood to shrink and crack, while excessive humidity can lead to warping and swelling. Maintaining a consistent humidity level between 30% and 50% is ideal for preserving the integrity of your wood floors.
Regular Cleaning and Maintenance
Regular cleaning and maintenance can help prevent dust, dirt, and spills from damaging the wood floor. Vacuuming regularly and using a damp mop to clean spills can help extend the life of your wood floors.

Filler Facts Wood Isn T Always The Right Solution Rosebud Floors

What Is The Best For Filling Gaps In Floorboards Mr Sander

Repairing And Filling Cracks In Hardwood Flooring With Epoxy Sawdust

How To Repair Cracks In Wood Floors 8 Steps With Pictures

Filler Facts Wood Isn T Always The Right Solution Rosebud Floors

Trowel Filling Repairing Wood Floor Cracks Sanding

Woodfiller For Hardwood Floors Advice

How To Fix Gaps In 110 Year Old Pine Floors

How To Fill In Gaps Between Hardwood Flooring With Wood Filler Youtube

Eek My Hardwood Floor Has Gaps Valenti Flooring