Removing Glue Down Wood Flooring: A Comprehensive Guide
Removing glue-down wood flooring is a challenging but often necessary task when renovating or replacing existing flooring. This type of flooring is adhered directly to the subfloor with a strong adhesive, making its removal more labor-intensive than removing floating or nail-down floors. Understanding the proper techniques and tools can significantly ease the process and minimize damage to the subfloor.
This article provides a comprehensive guide to removing glue-down wood flooring, covering preparation, necessary tools, step-by-step instructions, and post-removal subfloor preparation. It aims to equip individuals and professionals with the knowledge to undertake this project effectively and safely.
Before initiating the removal process, it is crucial to assess the type of adhesive used and the condition of the subfloor. Identifying the adhesive can inform the choice of removal methods and solvents. A damaged or uneven subfloor may require additional repair or leveling after the flooring is removed.
Preparing for the Removal Process
Proper preparation is paramount for a successful and efficient glue-down wood floor removal. This stage involves gathering the necessary tools and materials, preparing the work area, and taking safety precautions.
The following tools are typically required: a pry bar, a wide floor scraper (manual or powered), a hammer, a utility knife, safety glasses, work gloves, a dust mask or respirator, a heat gun or heat source (optional), adhesive remover solvent (optional), plastic sheeting, duct tape, and trash bags or containers for debris.
Preparing the work area involves removing all furniture, appliances, and other obstructions from the room. Protect adjacent flooring and walls with plastic sheeting and duct tape to prevent damage from flying debris and solvent spills. Ensure adequate ventilation in the work area, particularly when using adhesive removers.
Safety is a primary concern. Always wear safety glasses to protect the eyes from flying debris. Work gloves protect hands from splinters and sharp edges. A dust mask or respirator is essential to prevent inhalation of dust and solvent fumes. It is advisable to wear hearing protection if using power tools that generate significant noise.
Before beginning the physical removal, score the wood flooring with a utility knife along the grain, especially in sections with stubborn adhesive. This can help to weaken the bond and facilitate easier removal. Consider testing a small, inconspicuous area with a heat gun or adhesive remover to determine the most effective method for loosening the glue.
Step-by-Step Glue-Down Wood Flooring Removal
The removal process involves systematically separating the wood flooring from the subfloor. The specific approach may vary depending on the type of adhesive, the flooring material, and the condition of the subfloor.
Begin by using a pry bar and hammer to pry up a starting section of the wood flooring. Insert the pry bar between the flooring and the subfloor, and gently tap the end of the pry bar with the hammer. Apply steady pressure to lift the flooring, working along the edges to loosen the adhesive bond.
Once a section of flooring is lifted, use a wide floor scraper to remove the remaining flooring and adhesive. A manual floor scraper can be effective for smaller areas or for removing stubborn adhesive patches. A powered floor scraper can expedite the process for larger areas, but requires more caution to avoid gouging the subfloor.
For areas where the adhesive is particularly strong, a heat gun can be used to soften the glue. Apply heat evenly to the flooring, being careful not to overheat or scorch the wood. The heat will typically soften the adhesive, making it easier to scrape away.
If a heat gun is insufficient, an adhesive remover solvent may be necessary. Apply the solvent according to the manufacturer's instructions, ensuring adequate ventilation and wearing appropriate protective gear. Allow the solvent to dwell for the recommended time to soften the adhesive before scraping. Be aware of the potential for solvents to damage certain types of subfloors, and test in an inconspicuous area first.
Continue the process of prying, scraping, heating (if applicable), and applying adhesive remover (if applicable) until all of the wood flooring is removed. Work systematically across the room, removing manageable sections at a time. Dispose of the removed flooring and adhesive in trash bags or containers, following local regulations for waste disposal.
Preparing the Subfloor After Removal
Once the wood flooring is removed, the subfloor typically requires preparation before new flooring can be installed. This involves removing residual adhesive, repairing any damage, and leveling the surface.
After the bulk of the flooring is removed, the subfloor will likely have residual adhesive. Various methods can be used to remove this adhesive, including scraping, sanding, and chemical removal. A floor scraper can remove large chunks of adhesive. A floor sander with a coarse grit sandpaper can remove a thin layer of adhesive, but generates a significant amount of dust and requires proper dust collection. Adhesive remover solvents can also be used, following the same precautions as during the initial flooring removal.
Inspect the subfloor for any damage, such as cracks, holes, or unevenness. Repair any damage with appropriate patching compounds or fillers. Cracks can be filled with concrete crack filler. Holes can be filled with self-leveling underlayment or patching compound. Allow the repair materials to dry and cure completely before proceeding.
Level the subfloor to ensure a smooth and even surface for the new flooring. Unevenness can cause problems with the installation and performance of the new flooring. Self-leveling underlayment is a common solution for leveling subfloors. Pour the self-leveling underlayment according to the manufacturer's instructions, ensuring that it covers the entire surface evenly. Allow the underlayment to dry and cure completely before installing the new flooring.
After leveling, the subfloor should be cleaned thoroughly to remove any dust, debris, or residual adhesive. Vacuum the entire surface, paying attention to corners and edges. A damp mop can be used to remove any remaining dust, but avoid saturating the subfloor with water. Allow the subfloor to dry completely before installing the new flooring.
Finally, check the moisture content of the subfloor before installing the new flooring. Excessive moisture can cause problems with the adhesion and stability of the new flooring. Use a moisture meter to measure the moisture content, and ensure that it is within the acceptable range specified by the flooring manufacturer. If the moisture content is too high, take steps to dry the subfloor before proceeding.
By following these steps, individuals can successfully remove glue-down wood flooring and prepare the subfloor for new flooring installation. Careful planning, the use of appropriate tools, and attention to safety are essential for achieving a professional result.

How To Remove Glued Wood Flooring Easy Diy Steps Faqs And Abbotts At Home

How To Remove Glued Wood Flooring And Engineered On Concrete

Austin Dust Free Tile And Wood Floors Removal

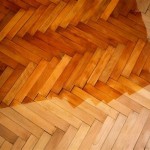
Removing Parquet Flooring Floor Adhesive Lessons Learned Life After 40

Diy Guide Step By Tutorial For Removing Vinyl Tile Flooring That S Glued Down Lx Hausys

How To Remove Glue Down Wood Flooring 2024 7 Super Easy Steps

How To Remove Glued Wood Flooring Easy Diy Steps Faqs And Abbotts At Home

How To Remove Glued Wood Flooring Youtube

Removing Glue Or Adhesive From Hardwood Floors The Speckled Goat

Engineered Hardwood Flooring Removal Sydney