Outdoor Wood Flooring Over Concrete: A Comprehensive Guide
Outdoor living spaces have become increasingly popular, representing a desire for homeowners to extend their comfort and style beyond the interior walls. Concrete patios, decks, and balconies often serve as the foundation for these spaces. While durable and practical, concrete can be aesthetically limiting and uncomfortable underfoot. Installing outdoor wood flooring over concrete offers a solution that combines the structural benefits of concrete with the natural beauty and warmth of wood.
This article provides a comprehensive guide to understanding the process of installing outdoor wood flooring over concrete, covering crucial aspects like material selection, preparation, installation techniques, and maintenance considerations. This information is intended to equip homeowners and contractors with the knowledge needed to achieve a successful and lasting outdoor wood flooring project.
Understanding the Benefits of Wood Flooring Over Concrete
Choosing to overlay concrete with wood flooring offers several advantages that enhance the usability and appeal of outdoor spaces. One major benefit is improved aesthetics. Wood introduces a natural element, offering warmth and visual texture that concrete often lacks. This enhancement contributes to a more inviting and comfortable outdoor environment.
Comfort is another significant factor. Wood surfaces tend to be cooler than concrete under direct sunlight, making them more pleasant to walk on during warm weather. The inherent flexibility of wood also provides a more forgiving surface compared to the hardness of concrete, contributing to greater comfort for walking and standing.
Furthermore, wood flooring can effectively conceal imperfections in the existing concrete surface. Cracks, stains, and unevenness that detract from the appearance of the concrete can be hidden beneath the new wood surface, instantly improving the overall visual appeal. This provides a cost-effective alternative to extensive concrete repairs.
Finally, the addition of wood flooring can increase the property value. A well-designed and properly installed outdoor wood floor enhances the perceived value of the home, making it more attractive to potential buyers. This is especially true in areas where outdoor living is highly valued.
Selecting the Right Wood for Outdoor Use
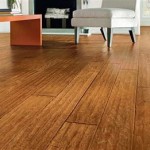
The selection of wood species is arguably the most critical decision when installing outdoor wood flooring. Not all woods are suitable for outdoor applications, and choosing the wrong type can lead to premature decay, warping, and other problems. Durability, resistance to moisture and insects, and aesthetic preferences should all influence the selection process.
Naturally durable hardwoods are generally the best choice for outdoor flooring. These species have inherent properties that make them resistant to rot, decay, and insect infestation. Popular choices include:
*Ipe:
Known for its exceptional hardness, density, and resistance to decay, Ipe is a premium option that offers a long lifespan. It exhibits a rich, dark brown color and can withstand harsh weather conditions. *Teak:
Another highly durable hardwood, teak is naturally oily, which provides excellent water resistance. It has a golden-brown color and weathers gracefully to a silver-gray patina if left untreated. *Cumaru:
Often referred to as Brazilian Teak, Cumaru is a strong and durable hardwood that offers good resistance to decay and insects. It has a reddish-brown color and is a more affordable alternative to Ipe and Teak. *Redwood:
While technically a softwood, redwood is a naturally durable option that is resistant to decay and insects. It has a distinctive reddish color and is a sustainable choice due to responsible forestry practices.In addition to naturally durable hardwoods, pressure-treated lumber is also a viable option for outdoor wood flooring. Pressure treatment involves impregnating softwood with chemicals that protect it from decay and insect infestation. Ensure that the lumber is treated with chemicals suitable for ground contact, as this provides the highest level of protection.
Beyond the species itself, consider the grade of the lumber. Select lumber that is free from knots, cracks, and other defects that can compromise its structural integrity. Kiln-dried lumber is preferred, as it has been dried to a low moisture content, which reduces the risk of warping and shrinkage.
Preparing the Concrete Surface and Ensuring Proper Drainage
Proper preparation of the concrete surface is essential for a successful outdoor wood flooring installation. A clean, level, and structurally sound concrete base will ensure that the wood flooring is stable and durable. Furthermore, addressing drainage issues is crucial to prevent water from accumulating beneath the wood, which can lead to decay and other problems.
Begin by thoroughly cleaning the concrete surface to remove dirt, debris, and any loose material. Use a pressure washer or a stiff brush and a cleaning solution to remove any stains or algae growth. Allow the concrete to dry completely before proceeding.
Inspect the concrete surface for cracks and other damage. Minor cracks can be filled with a concrete patching compound. Larger cracks or structural damage may require professional repair before installing the wood flooring. Ensure that the patching compound is fully cured before moving on.
Leveling the concrete surface is critical to ensure that the wood flooring is even and stable. Use a self-leveling concrete compound to fill in low spots and create a smooth, level surface. Follow the manufacturer's instructions carefully when applying the self-leveling compound.
Addressing drainage is paramount to prevent moisture damage. Ideally, the concrete surface should have a slight slope away from the house to allow water to drain properly. If the concrete is relatively level, consider installing a drainage membrane or creating a slight slope with the self-leveling compound. Install a system that will permit water to evacuate from under the wood flooring to prevent mold, mildew and rot from forming.
Consider installing a vapor barrier between the concrete and the wood flooring to further protect the wood from moisture. A 6-mil polyethylene film can be used as a vapor barrier. Overlap the edges of the film by at least 6 inches and seal the seams with waterproof tape.
Installation Techniques for Outdoor Wood Flooring
There are several methods for installing outdoor wood flooring over concrete, each with its own advantages and disadvantages. The choice of installation method will depend on the type of wood flooring, the condition of the concrete surface, and the desired aesthetic.
One common method involves using a system of sleepers or furring strips. Sleepers are typically pressure-treated lumber that is attached to the concrete surface using concrete anchors or construction adhesive. The wood flooring is then attached to the sleepers using screws or nails. This method creates an air gap between the concrete and the wood flooring, promoting ventilation and preventing moisture buildup.
An alternative method involves using interlocking wood tiles or decking squares. These tiles are typically made of durable hardwoods or composite materials and are designed to snap together easily. They can be installed directly over the concrete surface without the need for sleepers or fasteners. Interlocking tiles are a convenient and relatively quick option for smaller areas.
When installing wood flooring directly over concrete, it is essential to use a waterproof adhesive that is specifically designed for outdoor applications. Apply the adhesive to the concrete surface and then press the wood flooring into place. Ensure that the wood flooring is properly aligned and that there are no gaps between the boards.
Regardless of the installation method, it is crucial to leave expansion gaps between the wood flooring and any surrounding structures, such as walls or posts. Wood expands and contracts with changes in temperature and humidity, and these gaps will allow the wood to move freely without causing damage to the flooring or the surrounding structures. Use spacers to maintain consistent expansion gaps during installation.
Consider the direction of the wood flooring when planning the installation. Running the boards parallel to the longest dimension of the space can create a sense of spaciousness. Alternatively, running the boards perpendicular to the house can draw the eye outward and create a more inviting outdoor space.
Maintenance and Long-Term Care
Proper maintenance is essential to ensure the longevity and beauty of outdoor wood flooring. Regular cleaning, sealing, and other preventative measures will help protect the wood from the elements and prevent premature decay.
Clean the wood flooring regularly to remove dirt, debris, and algae growth. Use a broom or a leaf blower to remove loose debris. For more thorough cleaning, use a mild soap and water solution and a scrub brush. Avoid using harsh chemicals or abrasive cleaners, as these can damage the wood.
Apply a sealant or stain to the wood flooring to protect it from moisture and UV radiation. Choose a sealant or stain that is specifically designed for outdoor use and that is compatible with the type of wood flooring. Apply the sealant or stain according to the manufacturer's instructions.
Inspect the wood flooring regularly for signs of damage, such as cracks, splinters, or decay. Repair any damage promptly to prevent it from worsening. Replace any boards that are severely damaged or decayed.
Consider applying a wood preservative to the wood flooring to further protect it from decay and insect infestation. Wood preservatives contain chemicals that kill fungi and insects, preventing them from damaging the wood.
Protect the wood flooring from excessive moisture. Ensure that the area is properly drained and that there are no leaks or other sources of water that could damage the wood. Consider covering the wood flooring during periods of heavy rain or snow.
By following these maintenance tips, homeowners can ensure that their outdoor wood flooring remains beautiful and durable for many years to come.

How To Lay Deck Flooring On A Concrete Patio The Home

How To Lay Deck Flooring On A Concrete Patio The Home

Transform Your Concrete Patio With These Amazing Ideas

13 Great Diy Outdoor Patio Flooring Ideas On A Budget Tiles Deck Over Concrete

Outdoor Tile Woodstone Sleepers Marshalls Plc For Floor Wooden Concrete

14 Outdoor Flooring Options Ultimate Guide

What Is The Best Patio Flooring Over Concrete Options

Waterproof Plastic Wood Composite Flooring Outdoor Interlocking Patio Deck For Backyard Tiles On Dirt And Concrete China Wpc Diy Decking Made In Com

Perforated Interlocking Patio Tiles Over Concrete Made In Usa

Concrete Patio Transformation 7 Steps To Diy A New Outdoor Oasis