```html
Easy To Install Wood Flooring: A Comprehensive Guide
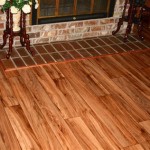
The allure of wood flooring is undeniable. It brings warmth, elegance, and timeless appeal to any space. While professional installation guarantees a flawless result, the advancements in flooring technology have made "easy to install wood flooring" a viable option for many homeowners seeking a cost-effective and rewarding DIY project. Understanding the various types, preparation requirements, and installation techniques is crucial for achieving a successful outcome.
This article delves into the realm of easy-to-install wood flooring, covering the different types available, outlining the essential preparation steps, providing detailed installation instructions, and addressing potential challenges. The objective is to equip readers with the knowledge necessary to confidently tackle a wood flooring installation project and achieve professional-looking results.
Understanding the Types of Easy to Install Wood Flooring
The "easy to install" designation typically applies to specific types of wood flooring engineered for simplified installation methods. These methods primarily involve click-lock or tongue-and-groove systems that eliminate the need for nails, staples, or glue in many cases. Understanding the differences between these types is crucial for selecting the most suitable option for a given project and skill level.
1. Engineered Wood Flooring with Click-Lock System: This is arguably the most popular choice for DIY installations. Engineered wood consists of multiple layers of wood veneer bonded together, topped with a layer of real hardwood. The click-lock system involves interlocking edges that snap together, creating a floating floor. This eliminates the need for adhesives or fasteners, making it significantly easier to install compared to traditional hardwood flooring.
The benefits of engineered wood with a click-lock system include its dimensional stability, making it less susceptible to warping or expanding and contracting due to changes in humidity. This characteristic makes it suitable for installation in basements or over concrete subfloors. Furthermore, the click-lock mechanism allows for easy disassembly if necessary, facilitating repairs or adjustments.
2. Laminate Flooring: While not technically "wood" flooring, laminate often mimics the appearance of wood and utilizes a similar click-lock installation system. Laminate consists of a high-density fiberboard (HDF) core topped with a photographic layer that replicates wood grain. A protective wear layer is applied to provide durability. Laminate is generally more affordable than engineered wood and offers excellent resistance to scratches, stains, and fading.
The ease of installation with laminate flooring stems from its click-lock system and lightweight construction. However, laminate is not as resistant to moisture as engineered wood and is typically not recommended for installation in bathrooms or areas prone to spills. While it offers good durability, it lacks the natural feel and longevity of real wood.
3. Solid Wood Flooring with Tongue-and-Groove (Limited Easy-Install Options): Traditional solid wood flooring, created from a single piece of hardwood, is typically installed using nails, staples, or glue. However, some manufacturers now offer solid wood flooring with modified tongue-and-groove systems designed for easier floating installations. These systems may incorporate specific locking mechanisms or require specialized underlayments to achieve a secure and stable floor.
While these options can be considered "easier" than traditional solid wood installation, they still require a higher level of skill and precision compared to click-lock systems. The expansion and contraction of solid wood due to humidity changes must be carefully considered, and proper acclimation is essential to prevent issues like warping or gapping.
Essential Preparation for Easy Wood Flooring Installation
Regardless of the chosen wood flooring type, proper preparation is paramount for a successful installation. Neglecting this step can lead to problems such as uneven floors, squeaking, and premature wear. The preparation process involves assessing the subfloor, ensuring cleanliness and levelness, and acclimating the flooring material.
1. Subfloor Assessment and Preparation: The subfloor is the foundation upon which the new wood flooring will be installed. Common subfloor types include concrete and plywood. A thorough inspection is crucial to identify any imperfections, such as cracks, holes, or unevenness. Concrete subfloors should be tested for moisture content to prevent future issues with mold or adhesive failure (if using glue-down methods). Plywood subfloors should be securely fastened to the floor joists and free from rot or damage.
Any imperfections in the subfloor must be addressed before installation. Cracks in concrete should be filled with a concrete patching compound, and uneven surfaces should be leveled with a self-leveling compound. Loose or damaged plywood should be repaired or replaced. Ensuring a clean and level subfloor is crucial for a smooth and stable final result.
2. Cleaning the Subfloor: Before installation can begin, the subfloor must be thoroughly cleaned to remove any dust, debris, or contaminants. Vacuuming and sweeping are essential to remove loose particles. For concrete subfloors, a damp mop can be used to remove stubborn dirt. However, ensure the subfloor is completely dry before proceeding with installation.
The presence of dust or debris can interfere with the adhesion of underlayment or adhesives, leading to uneven spots and potential squeaking. A clean subfloor provides a solid and stable surface for the new wood flooring.
3. Acclimating the Wood Flooring: Acclimation refers to the process of allowing the wood flooring to adjust to the temperature and humidity of the installation environment. This is crucial for minimizing expansion and contraction after installation, which can lead to warping, gapping, or buckling.
The acclimation period typically lasts for several days, depending on the wood flooring type and the difference in temperature and humidity between the storage environment and the installation environment. The flooring should be laid flat in the room where it will be installed, allowing air to circulate around the planks. Following the manufacturer's recommendations for acclimation is vital for ensuring a successful and long-lasting installation.
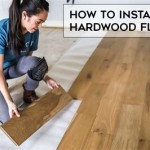
Detailed Installation Instructions for Click-Lock Wood Flooring
The click-lock system makes installing wood flooring a manageable DIY project. These instructions provide a step-by-step guide to ensure a smooth and professional-looking result. While specific details may vary slightly depending on the manufacturer and product, the core principles remain consistent.
1. Planning and Layout: Before starting, carefully plan the layout of the flooring. Consider the direction of the planks and how they will interact with existing features like doorways and walls. It's generally recommended to run the planks parallel to the longest wall in the room to create a more spacious feel. Use a chalk line to mark the starting point and ensure a straight and consistent installation.
Calculating the required amount of flooring is crucial to avoid running short. Add approximately 10% to the total square footage of the room to account for waste and cuts. This will ensure you have enough material to complete the project without unexpected shortages.
2. Installing Underlayment: Underlayment provides a cushioning layer, reduces noise, and can act as a moisture barrier. Roll out the underlayment according to the manufacturer's instructions, overlapping the seams slightly and taping them together. The type of underlayment chosen should be compatible with the specific type of wood flooring being installed and the subfloor conditions.
Ensure the underlayment is smooth and free from wrinkles or creases. This will provide a level surface for the wood flooring and prevent uneven areas or squeaking.
3. Installing the First Row: Begin installing the flooring planks along the starting line, ensuring a consistent gap between the planks and the wall. This gap, typically ¼ to ½ inch, allows for expansion and contraction of the flooring. Use spacers to maintain this gap throughout the installation. Align the tongue or groove of the first row against the wall, depending on the manufacturer's instructions.
Accurate alignment of the first row is crucial for ensuring a straight and square installation. Use a level to verify the alignment and make any necessary adjustments before proceeding.
4. Connecting Subsequent Rows: Connect the planks in subsequent rows by aligning the tongue of one plank with the groove of the adjacent plank and gently locking them together. The click-lock mechanism should engage easily with a slight pressure. Avoid excessive force, which can damage the locking mechanism.
Use a tapping block and a rubber mallet to gently tap the planks together to ensure a tight and secure fit. Work your way across the room, row by row, maintaining the expansion gap along the walls.
5. Cutting Planks and Working Around Obstacles: Cutting planks is necessary to fit around doorways, pipes, and other obstacles. Use a saw (circular saw, miter saw, or jigsaw) to make precise cuts. Measure carefully and accurately to ensure a snug fit. For rounded objects like pipes, use a compass to trace the shape onto the plank and then cut along the traced line.
When cutting planks, always wear safety glasses and take precautions to avoid injury. Use appropriate tools for the type of material being cut, and follow the manufacturer's instructions for best results.
6. Installing the Final Row: Installing the final row may require cutting the planks to fit the remaining space. Measure carefully and cut the planks to the correct width, ensuring the expansion gap is maintained. Use a pull bar to help engage the locking mechanism on the final row, as space may be limited.
Pay close attention to the alignment and fit of the final row, as it will be highly visible. Use shims or spacers to maintain the expansion gap and ensure a professional-looking finish.
7. Installing Transition Strips and Baseboards: After the flooring is installed, install transition strips to cover the gaps between the new flooring and adjacent flooring types (e.g., carpet, tile). Install baseboards to cover the expansion gap along the walls, providing a finished and polished look.
Choose transition strips and baseboards that complement the style and color of the wood flooring. Secure them using nails, screws, or adhesive, depending on the type of material being used.
```
What S The Easiest Flooring To Install America

Lay Your Own Wood Floors Installing Real

Easiest 5 Diy Flooring Solutions Learn To Install On Your Own

Easiest Floor Ever How To Vinyl Plank

Floor Installation Jd Wood Flooring

Easy Way To Install Rustic Wood Floors Barn Loft Office Build Ep 11

How To Install Laminate Flooring A Step By Diy Guide

Flooring Types Pros And Cons Mr Handyman

How To Install Engineered Hardwood Floors 4 Easy Installation Options

Easy To Install Flooring For The Diy Er Extreme How